SAWHORSE SKILL BUILDER
Build A set of sturdy sawhorses, and get better at traditional woodworking!
In this video I link up with Woodcraft finally build a sturdy sawhorse. Something I have been looking to do for a long long time. I wanted to work on traditional woodworking skills, so I used through mortise and tenon joinery for the whole build. I incorporate some curves and use some simple accents to hone in my skills!
This project was super easy and only used (2) 2″x 8″ x 10’s
DOWNLOAD THE FREE PLAN here!

To tackle this project I have listed the products I recommend and use in my shop! You can check out the full list here !
Affiliate links are posted on this page. For more information on my Affiliate disclosure, check out my Disclosure Page.
This build has a lot of steps. It can seem intimidating, but it is not as daunting as it may seem. I break it down into 4 easy to follow parts
- Cut Stock From Cut List
- Glue up Top & Feet
- Layout/ Cut Mortises
- Cut Tenons
- Cut Profiles
- Assemble
The video is a basic over view for the build with some guidance and step by step. If you’re looking for a full plan, check that out here for FREE! SAWHORSE SKILL BUILDER PLAN
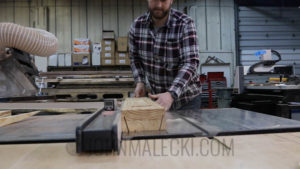
Cut Stock From Cut List
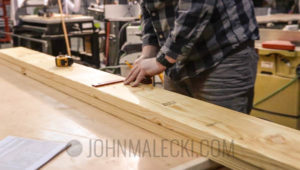
Layout and cut down store bought lumber to dimensions listed on the plan cut list!
Glue Up Top & Feet
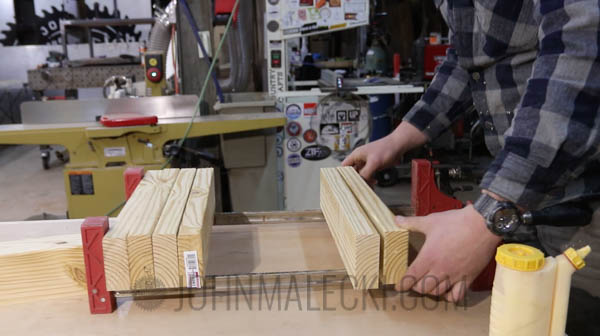
Glue up parts for top & the feet. These will be the only parts needing Glue
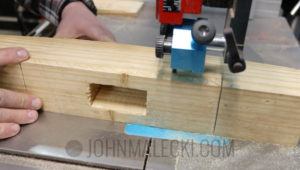
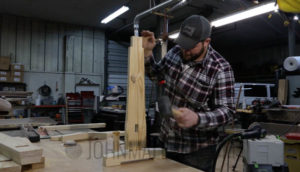
Layout/ Cut Mortises
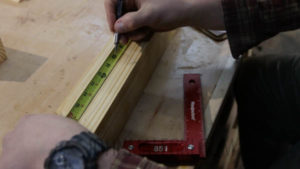

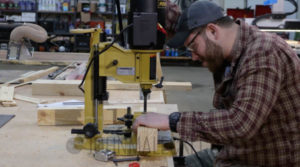
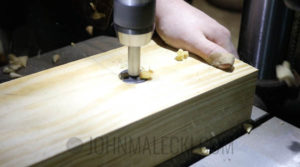
Layout mortises according to FREE PLAN and cut using a mortiser, drill press & chisel, or old school with a chisel and mallet .
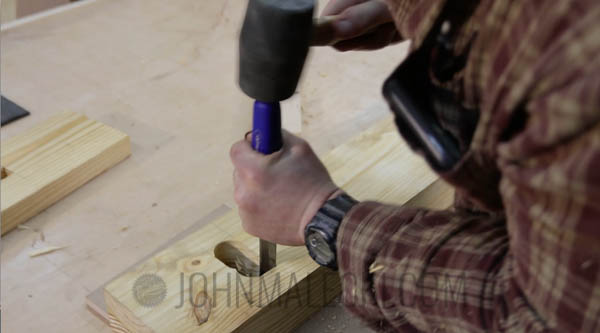
Clean up cuts with a hand chisel!
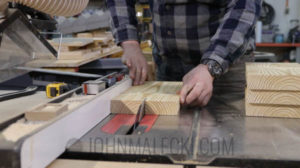
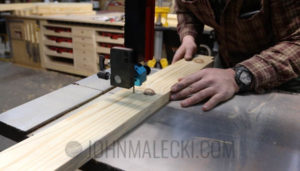
Cut Tenons
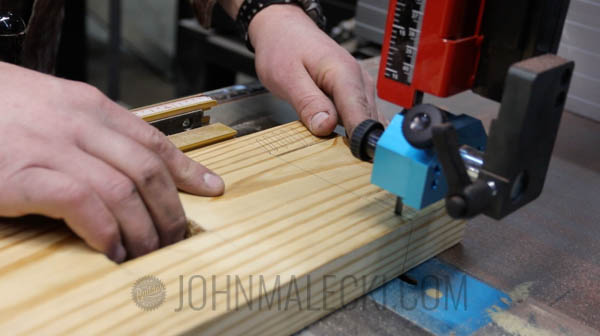
Layout and cut tenons according to the FREE PLAN. I use a bandsaw, but a handsaw or table saw would work just as easily.
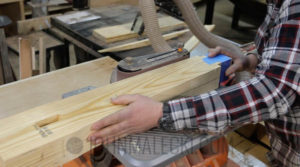
Cut top & Feet Profiles
Using your table saw & or bandsaw, cut the profiles according to the cut diagram. These steps are not necessary, but eliminate bulk and add some nice aesthetic.
Cut the Curves for the other visual aspects of the sawhorse. Then clean them up using a hand sander or a oscillating spindle sander
Assemble
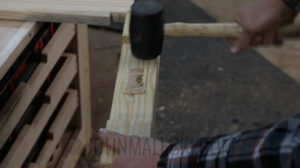
Assemble the sawhorse using glue and a rubber mallet. You can finish the horse with a coat of finish for protection. THATS A WRAP !
For more detailed instructions check out the full plan!
Check out some other shop projects!
PROUDLY SUPPORTED BY
![]() Please share and comment below with any questions about this product.
Please share and comment below with any questions about this product.


Nicely done John! 👍 Thanks for the plans! 👊
Thanks so much Fred, Glad you enjoy!
Comments are closed.