HOW TO FINISH RECLAIMED WOOD LIKE A PRO
4 steps to finish reclaimed wood like a pro
If you want to build high end reclaimed wood furniture, you have to know how to finish reclaimed wood like pro. Finishing can be the trickiest part of working with these materials. With a few simple tools it is easy to go from “standard” to a professional grade finish in 4 easy steps. I talk about preparation, application, and finishing techniques. Check out the video below!
- Prepare the Surface
- Sand the Surface
- Clean the Surface
- Apply your Finish
Some tools I Recommend.
- Makita Brush Sander
- Angle Grinder
- Wire Wheel
- General Finishes Endurovar
- Minwax Poly Acrylic
- Earlax 5500
Affiliate links are posted on this page. For more information on my Affiliate disclosure, check out my Disclosure Page.
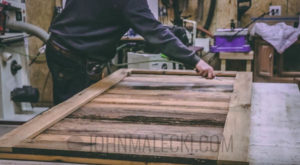
STEP 1 To Finishing Reclaimed Wood – Prep the Surface
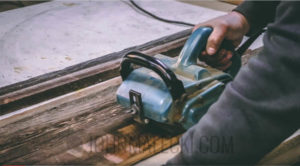
This stage is where you make your money when it comes to finishing reclaimed wood. You’re going to want to remove all of the dirt and grime from the wood. But you do not want to eliminate the saw marks and character. The trick is using the right tool. I recommend the Makita Brush Sander and/or anAngle Grinder with a Wire Wheel.
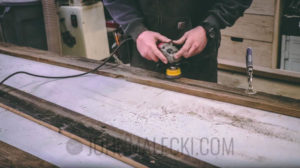
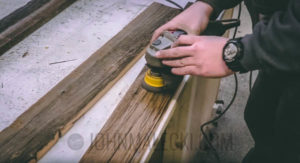
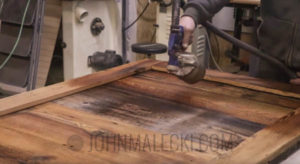
STEP 2 To Finishing Reclaimed Wood – Lightly Sand
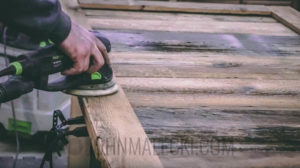
After you remove the heavy dust, its time for the finer stuff. Use your random orbit sander to sand the surface to a nice 220 grit finish. You want the surface to be smooth, but do not press too hard and grind into the wood. The key here is to not discolor the material. Let it look rough and dingy, but make it nice and smooth to the touch.
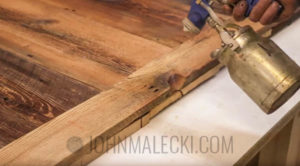
STEP 3 To Finishing Reclaimed Wood – Clean the Surface
- Simply blow off or vacuum all the particles you can on the surface for a nice consistent clean area to finish. Removing as much dust and debris is key here. You want to make sure you’re not getting little parts and particles in your finish. I use a combo of my air gun and vac. But if you’re brave and wanna spend a few extra dollars, try a Tac Cloth.
STEP 4 To Finishing Reclaimed Wood – Apply the Finish
Final step. Pick the finish of your choosing, and go to work! I like two products. Minwax Poly Acrylic and General Finishes Endurovar . Both have a nice high build and are able to be smoothed out to a high grade professional finish! If you’re spraying i would suggest a medium tip, and a 1/2 overlay. Make sure you’re not spraying too much and stay about 6″ -10″ above the surface holding the gun parallel. I like both of these because they dry fast and clean up very easily. Which is huge, if you spray and it sucks to clean up every time, you wont want to do it. But I am telling you. This stuff makes it cake.
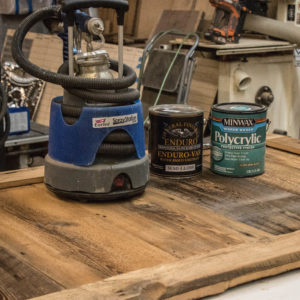
NOTE: If you do not have a sprayer, use a synthetic brush and thin coats to build your finish. I see lots of mistakes come when people glop it on and let it sit and coagulate. DON’T DO THAT! Sand between coats with 400 grit and BOOM. You now know how to finish reclaimed wood like a pro. GOOD LUCK!
I hope you enjoyed this build. Share your reclaimed wood projects on Instagram with @John_Malecki, I would love to see how you build!
Check out some of my reclaimed wood video projects HERE!!!


