HOW TO MAKE CABRIOLE LEGS
6 Steps To Easy Cabriole legs.
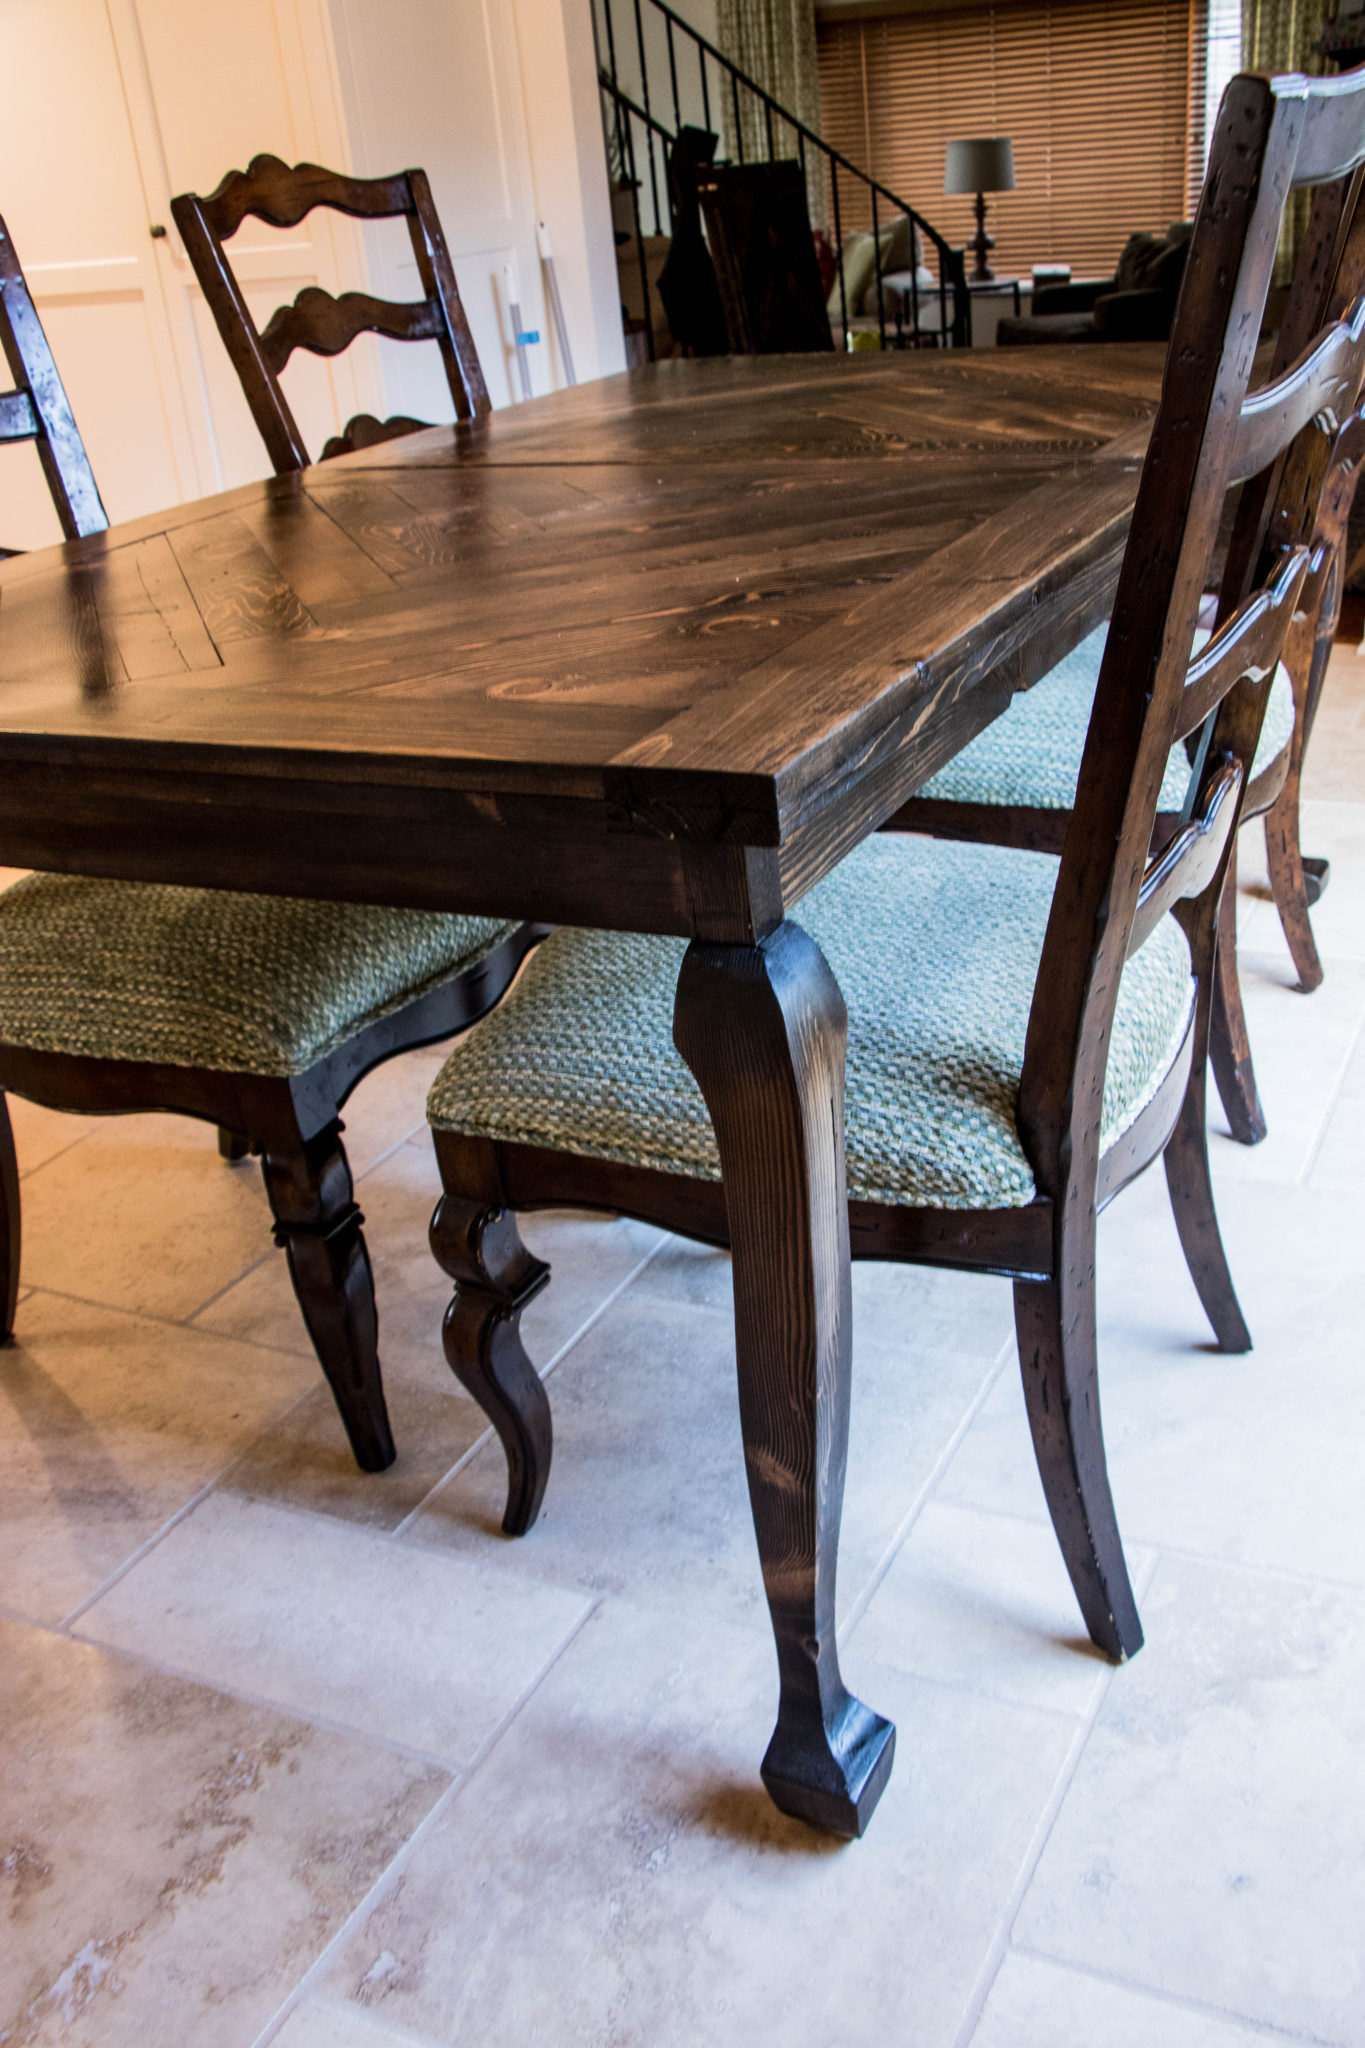
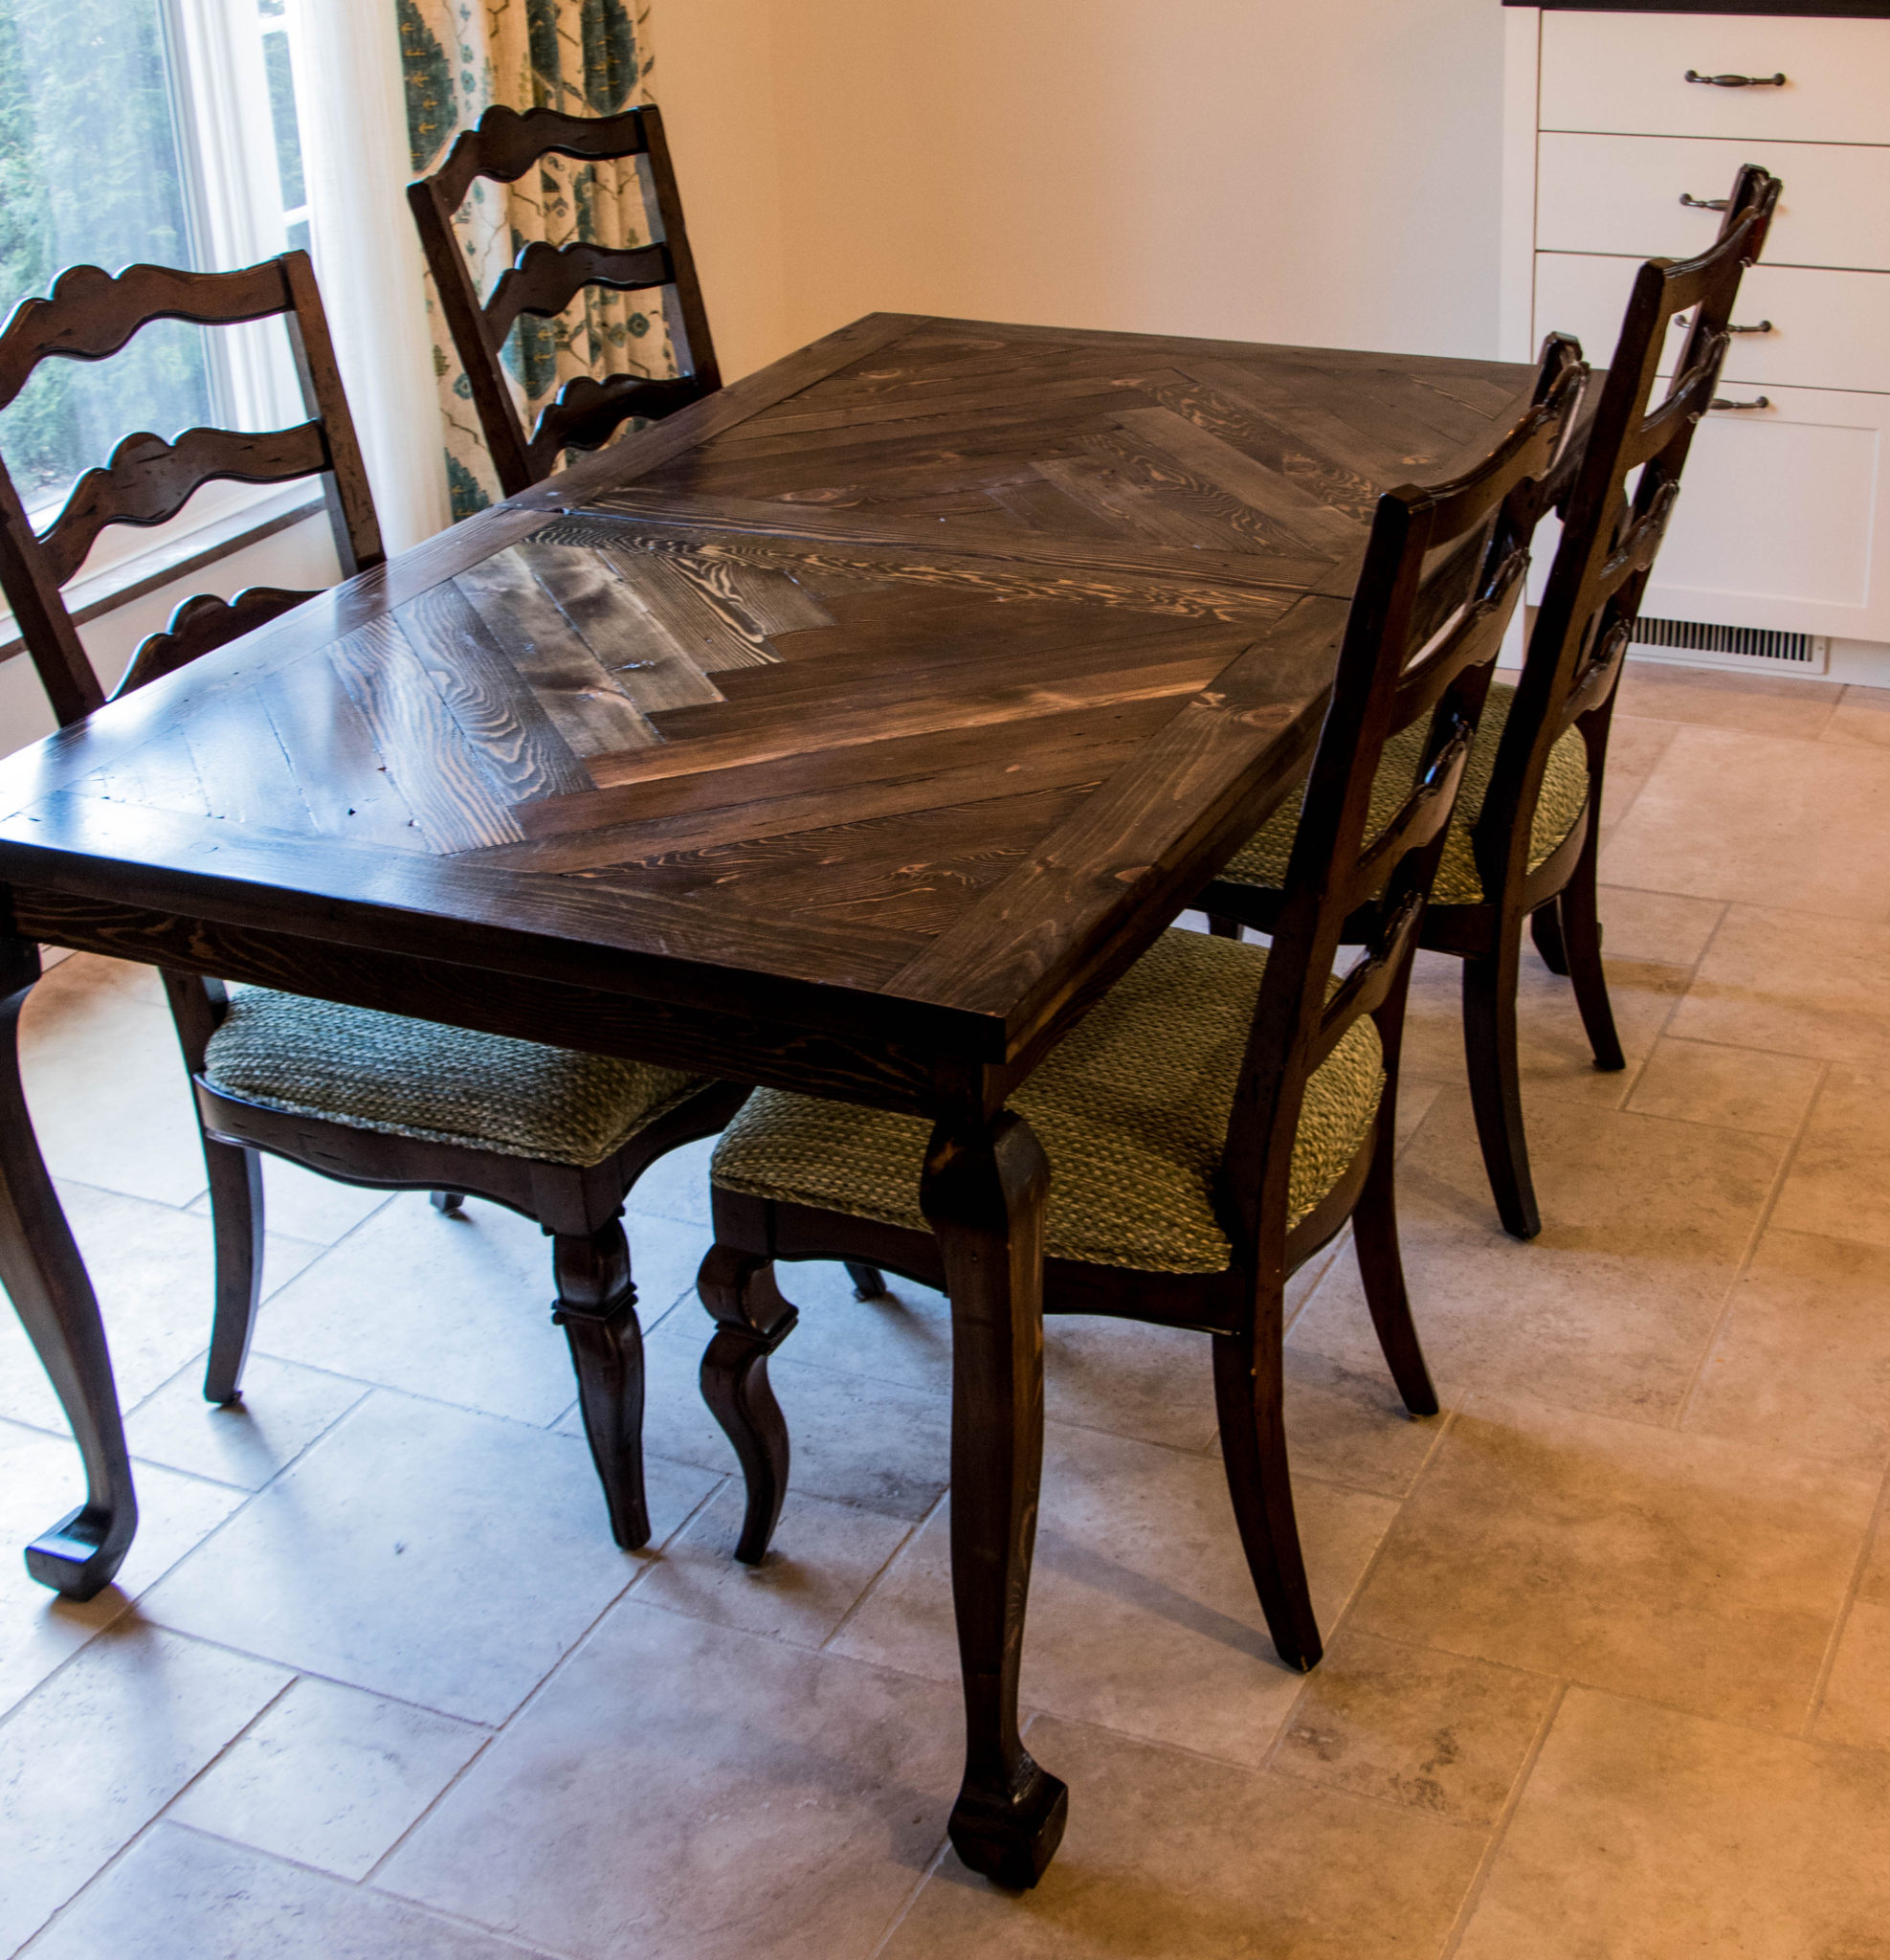
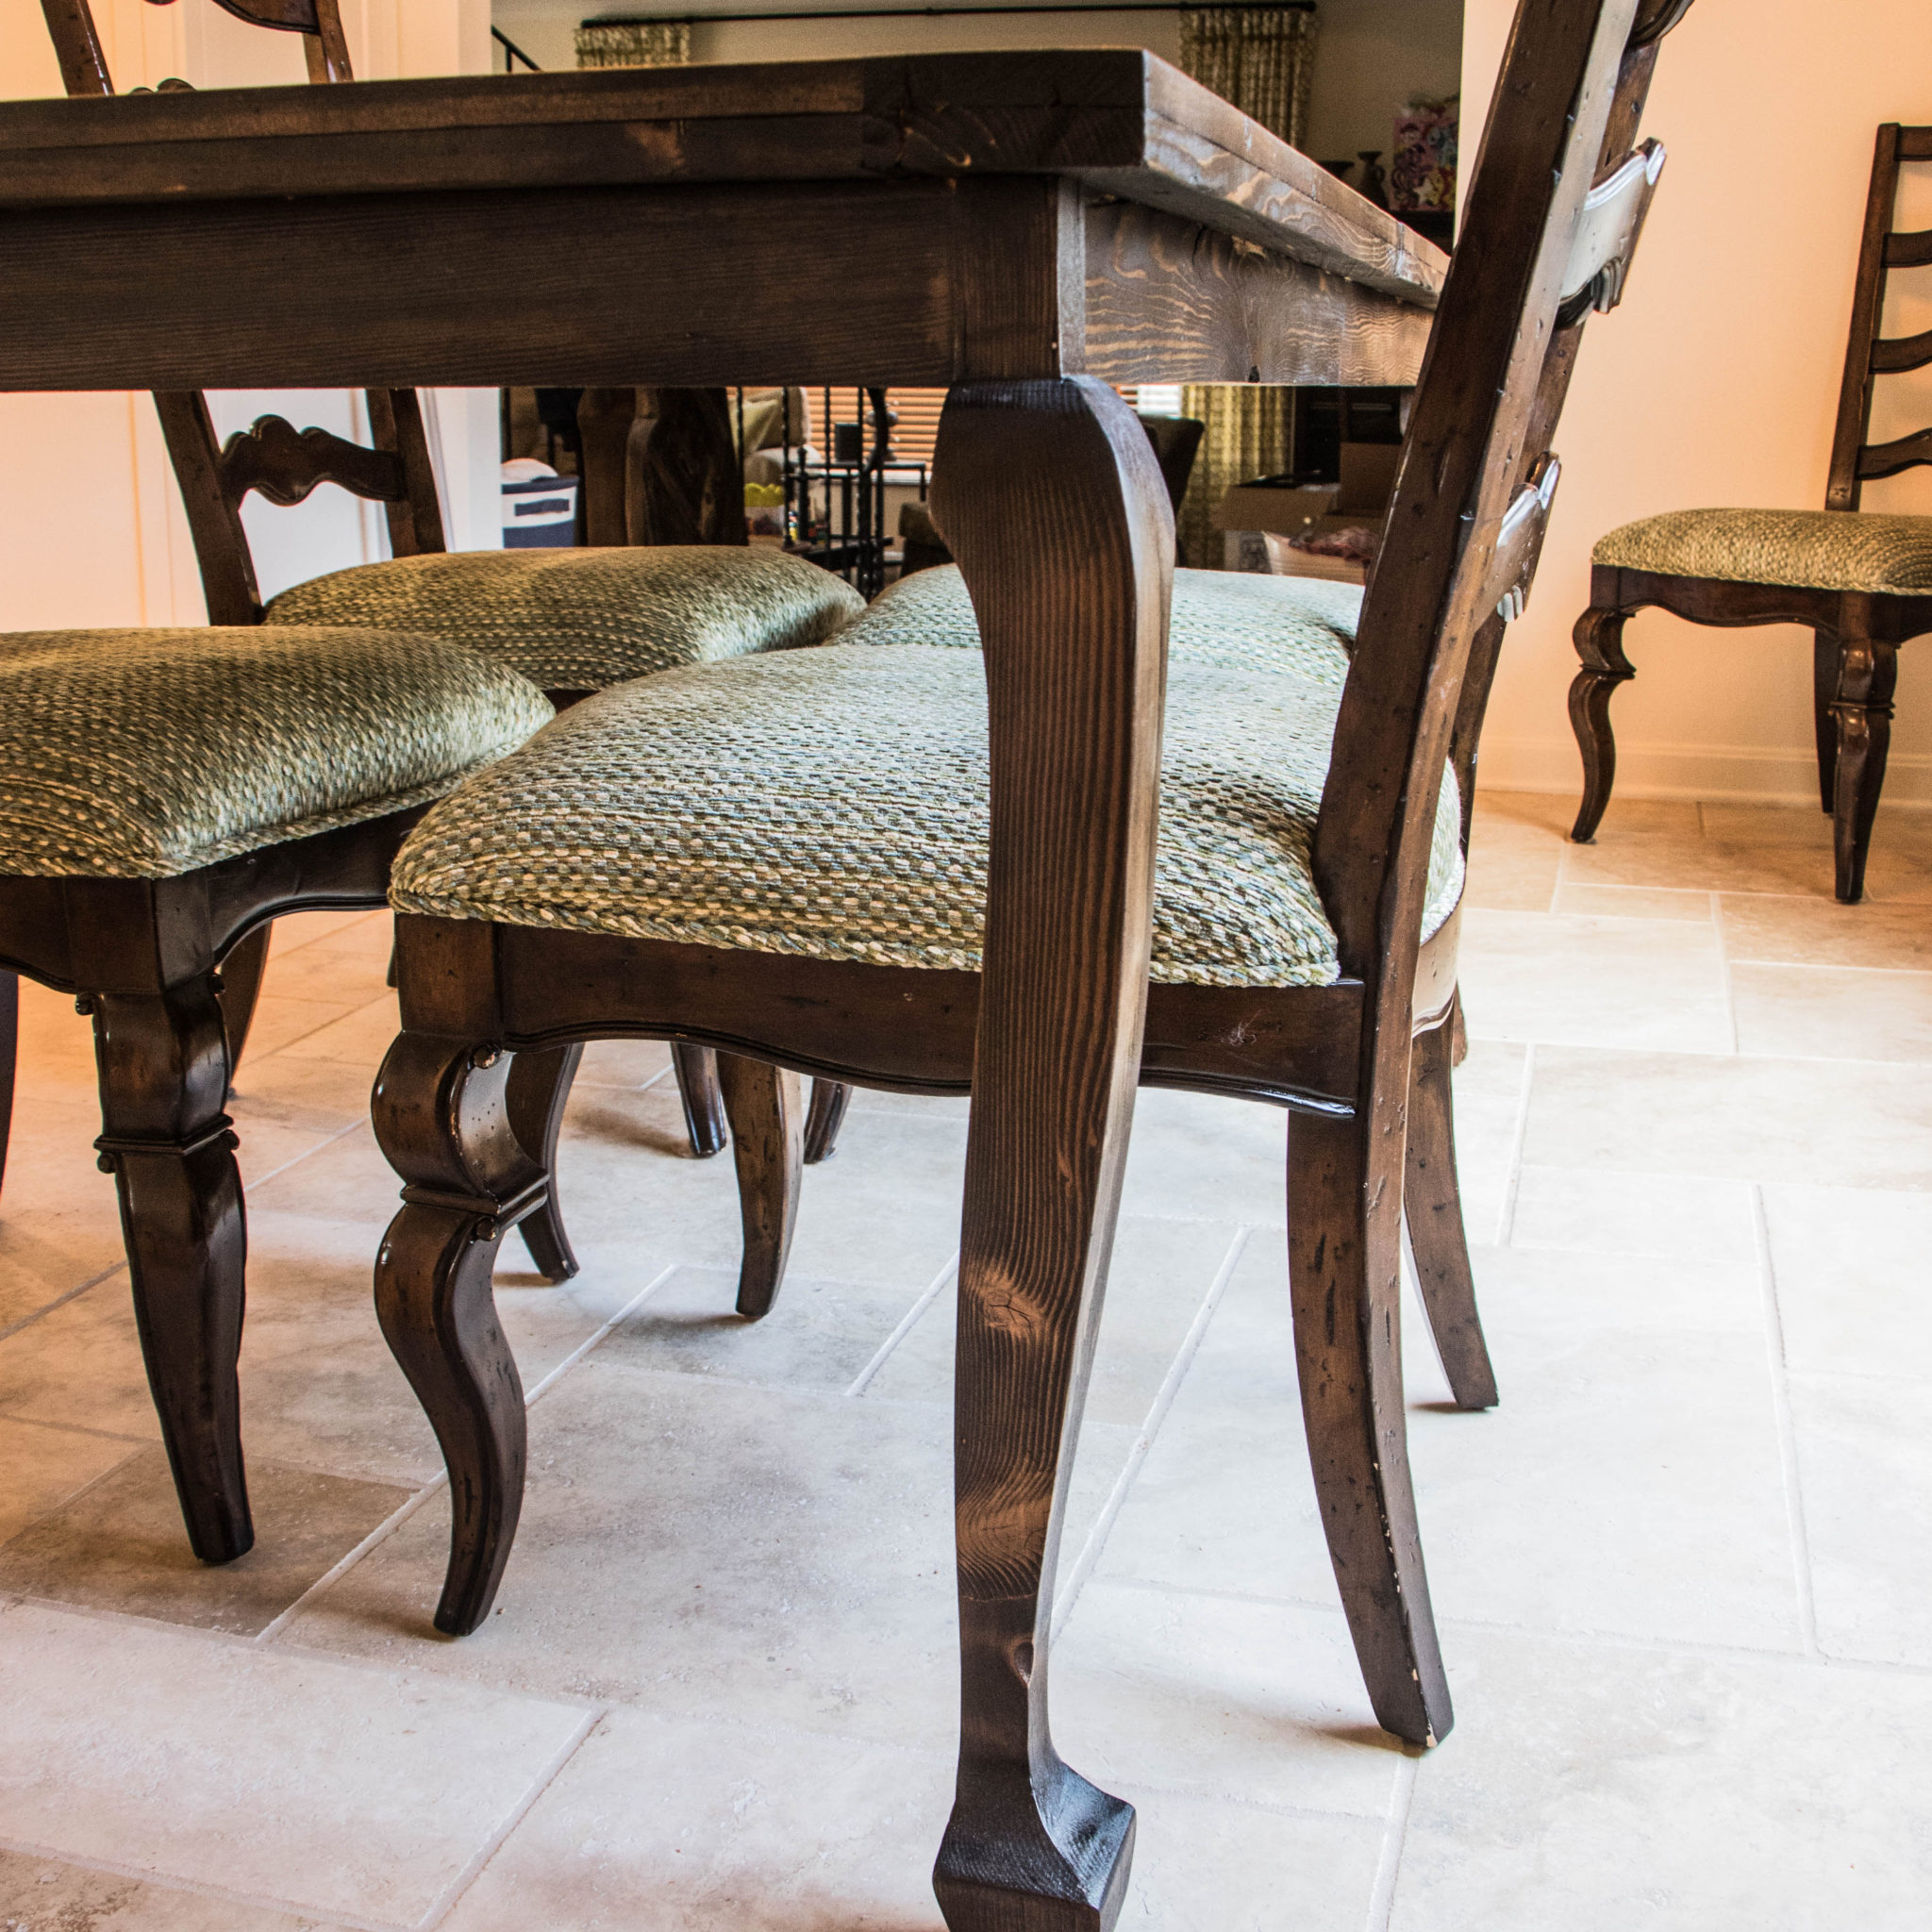
In this build I show how to quickly make a set of cabriole legs. Using some easy to follow steps, and minimal tools. The look of a nice curve like this in any piece of furniture, adds a ton of elegance to any project. The use of a template and a bandsaw is about all you need. For a better breakdown on the process check out my quick guide down below.
- Glue Up/ Select The Blank
- Layout & Cut Template
- Layout Template & Cut Joinery
- Cut Out Side 1
- Re-assemble Blank/ Cut Side 2
- Sand & Finish
Suggested Tools
Affiliate links are posted for your convenience and by using these links it provides support for the site at NO COST TO YOU. By purchasing anything through the links (even other products not listed) You help support the production of more quality content.
STEP 1 – Glue Up / Select The Blank
- In its most basic sense, all you need for this project is a blank. I used 28.5″ x 3″ x 3″ reclaimed pine for my application. This is dining table height, but the technique can also be used for coffee table use as well. When gluing up your blank remember your seam orientation. My wood being reclaimed, it added to the aesthetic, but be aware that is not always the case. Select stock that is straight grained with no voids or knots. Square you blank using conventional means with a jointer and planer, or you can buy your blank already cut to the needed dimensions.
STEP 2 – Layout & Cut Template
- Create a template for your leg, or use a pre-made one you print out online. I used 1/4″ scrap plywood. You could use a door skin, thick veneer, MDF, or even cardboard.
- Here are a few online templates and articles i found helpful
STEP 3 – Layout Template & Cut Joinery

- Trace your template onto your blank. Make sure you’re keeping your orientation in the correct corner. You want the vertical square at the top of the blank to meet in one corner.
- Cut your joinery, and if you’re using mortise and tenon joinery, cut the joinery before the blank is shaped. It will be much easier now compared to when the leg is shaped.
STEP 4 – Cut Out Side 1
- Being sure to mark the scrap areas on your leg, cut close to the line on the bandsaw. Take as large of chunks as possible in order to make it easier to re-adhere your leg back to the original blank shape.
STEP 5 – Re-assemble Blank/ Cut Side 2
- Using those “chunks” put the blank back together using painters tape, and re-draw your lines where they were covered by the tape. The go ahead and Repeat step 4. Like a magic trick, remove all of the tape and the leg takes its shape.
STEP 6 – Sand & Finish

- After the general shape is cut on the bandsaw, the leg appears from the blank. Here you can shape it to the final desire using a multitude of tools. I chose to use a orbital belt sander, and various hand sanders
I hope you enjoyed this build. Share your cabriole legs on Instagram with @John_Malecki, I would love to see your version!
CHECK OUT THE VIDEO HERE!
If you liked this video, check out some more of my woodworking projects here.


